Aquisition[]
Upon arrival in the area, you’re instantly confronted and soon will be attacked by a group of monsters. If you have Keldorn or Anomen in the party, after the battle they’ll identify one of the dead monsters as the paladin Ajantis, one of your former companions who, along with his squire and several other knights, were under an illusion that made them all appear as monsters. Garren Windspear will appear and following a brief dialogue he’ll invite you to his cabin where he'll provide you with a place of temporary sanctuary while he sets off to try to clear your name by contacting some of his former friends within the Most Noble Order of the Radiant Heart.
Walkthrough (abbreviated)[]
Confronting bandits[]
While Garren is away, his child will initiate a brief dialogue that culminates in a rest period cut scene. Upon awakening, the halfling Jum will appear and warn the party of approaching bandits. A second cut scene will begin and five bandits will appear inside the cabin. Immediately after they arrive, one of the bandits (the elven mage) will teleport Garren's child away while the leader, Plath Rededge, will engage the party in some dialogue that hints at part of the reason behind Lord Firkraag's interest with Gorion's Ward. When the dialogue ends, the remaining four bandits will turn hostile and attack.
Garren returns[]
After killing all of the remaining bandits, Garren will return to the cabin and lament the loss of his child; at first blaming the party, and then reconciling with the fact that it's his enemy Jierdan Firkraag who's truly behind the child's disappearance. He'll implore the party to find and safely return his child to him. He'll also reveal the Radiant Heart has heard his plea of the party's virtue and they demand justice for the slain knights, so that is now the party's task.
Once the party agrees to rescue Garren's child, the quest becomes official with an entry in the quest section of your Journal.
Finally, the halfling Jum will make a second appearance and deliver a note to the party before disappearing for good. Now it's time to seek out this Lord Firkraag and rescue that child. When you’re ready, head for the Dungeon Entrance in the northeast section of the area.
Firkraag's Entrance[]
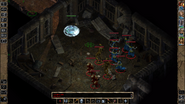
You find yourself in a Hobgoblin ambush, led by orog Chieftain DigDag, who briefly shouts and then retreats to warn the other area defenders. If you intercept and kill him (difficult to do), he drops Delver's Plate +2. The Hobgoblin Shaman will turn back neutral and flee the battle. Further in, to the west, is a pit which is guarded by Ogrillon creatures. To the south of them is a cavern with pools of water and stalagmites teeming with various Vampiric Mist and possibly Crimson Death creatures within. There are two hidden niches, you may search for items, including: Amulet of Protection +1 and gems.
A doorway on the center north of the main cavern is guarded by a group of Kamikaze Kobold fanatics led by a Ruhk Transmuter. The Kobolds will charge any detected party member and detonate themselves in a fiery explosion. The Rukh will defend the doorway with sword and spells. This Rukh possesses the Batalista's Passport ring.
Firkraag's Maze[]
Enter through the main door to Firkraag's Maze and encounter another ambush - the party is in the middle of a room, under the crossfire of Orc Archers letting loose Flaming Arrow missiles at the party from behind a barrier with arrow loopholes. There are secret doors on each of the walls that can be lockpicked or forced opened to allow melee attacks and even the odds somewhat. Afterward, open the main door (x 1860 y 2180) and go through that into an empty debris ridden room. There is another door past this, open it and go through into an east-west corridor.
Depending on the PC's XP level, you will face a Iron Golem or an Adamantite Golem here, otherwise a few Stone Golems. If the party takes a right in the corridor a dilapidated kitchen is seen with a common tongue speaking Troll Cook. The troll engages in dialogue, some of it is classic Baldur's gate humor. The party can kill or set free the troll (if you killed DigDag earlier then there will be different dialogue choice to do that). Search the broken table to find some enchanted arrows and bolts, and the Orcish Cookbook. This book offers advice as to what types of monsters' reside here and mentions a potential treasure in a well. The attached with a closed door and small descending stair run has an Otyugh inside it. Perhaps this is the Dungeon's garbage disposal room. There may be another band of hobgoblins with the Otuygh as well, depending on the protagonist's XP level.
Return to the corridor; at the western end are two more closed doors - pass through these (x 2050 y 1680) and find a room where two orcs are cowering. These are Derg the Orc and Flaylan the Orc. They don't want you to kill them, yet they obviously fear Firkraag even more. Dialogue allows the party to demand information. Or the player can summarily attack them. Another option allows them to flee if feeling merciful, and they will leave, never to return.
From the main corridor where the golems were encountered, there is a closed door to the North. Enter that room, which may be uninhabited or possibly have further orc defenders (depends on PC's XP level). Go further to the north into corridor with a locked door to the west, and an open passage to the east. The locked door requires a key. It can't be bashed. To the east leads to a large room covered in debris and stinking with the sickly-sweet odor of the dead. Within can be seen a huddled coven of Vampire, Mummy and ghast undead. They will promptly attack if any party members are detected and seek the blood and flesh of the living. There's one locked and trapped chest in here with treasure. Follow the passage right to another room with a closed door. Within is a Greater Wraith and possibly some other shadow creatures. Search the debris on the floor to find the Chapel Key and some bullets (x 3140 y 2630). This is the key needed to go further into the Maze.
Go back to the main passage and open the locked door with the Chapel Key (x 2600 y 1400). A female warrior clad in armor named Samia will speak to you.
Go through the south door (x 2450 y 1400), within this passage are several wolfweres that rush the first detected party member in a frenzy of slashing claws and bared fangs. Continue down this corridor and find a single closed door. Pass through (check for traps!) this door and within is another large chamber with a well, and great crevasse into the depths of the earth, a makeshift causeway leading to another corridor, and another passage leading elsewhere. If desired, click the well's winch twice (x 1250 y 1230) to raise the bucket. In the bucket is found the Dragon Helm, also a hostile Air Elemental is drawn out as well.
Further along there is an opening to a cavern, inside can be observed an ongoing argument between a Human male, a small troll and an orc. Observe the fight and hear their argument or join the battle and kill them all if desired. No one in this place seems to be particularly friendly. There is a secret passage here (x 500 y 1050) along the north wall. Enter and observe three golems (including an Adamantite Golem) which will animate and attack if any in the party are detected. At the far end of the room (x 800 y 450) is treasure niche: Within is found the Heartseeker long bow and gems.
Return to the previous passage and through the door to the south. Upon entering the next chamber is discovered two human male adventurers by the name Grancor and Falik. They address the party and ask for urgent help with healing their other partners further in the complex. The party can agree to help, or perhaps ask some questions first.
Through dialogue or other actions, it won't take long to realize these two acting suspiciously and are actually lycanthropes under disguise. Grancor is a Greater Wolfwere. Two additional wolfwere are in the next bed chamber. If the party prevails against these blood thirsty beasts, a third and final room has containers with various valuables, such as: Hold Undead scroll, Hold Monster scroll, Domination scroll, and the Horn of Blasting.
Now it's time to cross that previous makeshift bridge across the chasm. Continue on and various defenders will be present, including more Orog warriors. A closed door is found in a smallish chamber with various junk, and crates/barrels. Passing through the door is seen a winding stone staircase descending to another closed door. Always search for traps.
Descend the stairs, open the door and observe several orcs. Tazok will be present, and so will Chieftan DigDag if he was able to escape earlier. There will be some statements, dialogue and threats made leading to hostilities. Have a look at their creature pages for potential carried loot. Be sure to check this room for treasures, for there are good gems and spell scrolls.
You will find Garren's child in the right jail cell (x 2380 y 700). However, the door is locked and cannot be freed by conventional methods. You can have dialogue with the prisoner (Iltha or Taar) and promise to return with the key to liberate them.
Find the transition to stairs leading below to the next area map. On the player's Automap Notes this is marked as "Entrance to the Cavern".
Firkraag's Hideout[]
The party enters a large stone stairway descending to a great hall. This is Firkraag's lair. Move forward and all becomes apparent, Firkraag is a Dragon, a red Dragon to be more specific. He initiates dialogue when a party member is within detection distance. Standing beside the dragon is a human mage named Conster.
Through dialogue, if the party doesn't attack Firkraag or Conster his mage, then there is a chance for the party to make known that you aren't leaving without Garren's child. The dragon permits this, but first commands his mage back to the previous level, to defend the area to the death. This is as much a test for Conster as it will be for the party to perform the rescue of Garren's child from the jail cell.
It is also possible to preemptively attack Firkraag and or Conster from long range before any dialogue can begin.
Another option is through dialogue choices. The party can also just goad Firkraag (and by default: Conster) to become hostile, right here and right now. You can get the key needed to free Garren's child from Conster's body. Fighting the dragon and Conster at the same time is the greatest challenge level.
If the PC is a Paladin[]
After freeing Garen's child, return to his cabin. Garren and child will thank you (each party member receives 44,500 XP), and if Gorion's Ward is a paladin he will also send good words for you to the Most Noble Order of the Radiant Heart. When back in Athkatla, visit Prelate Wessalen to begin your stronghold duties. If you are a Fallen Paladin (or Fallen version of other Paladin class kits) you will regain your Paladin abilities upon completion of this quest when speaking with Garren (This is in addition to the later possibility of regaining Paladin powers during the Stronghold questline).
Mod gallery[]
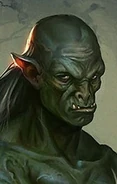
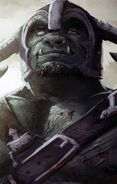
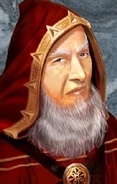
- Portraits from Portraits Portraits Everywhere
This section is about unofficial content that is only available via fan-made mods.

